Dials, Automatic No. 54 | |||||||
| Click here for standard dial adjustment information This dial was designed to reduce production costs. Because of this it is slightly different in construction than the normal steel based dials and maintenance of the dial is subtly different.
The main difference is that the spring cover is held in place by a single screw and the dial spindle back stop is fixed and does not have a screw which allowed the spring to be tensioned.
Reassembly is some what different.
Insert the spindle into the dial and then fix the spring and cover on, making sure that the spring locates in the slot in the spindle.
Replace the screw, complete with washer and tighten.
It is now assembled, but under no tension.
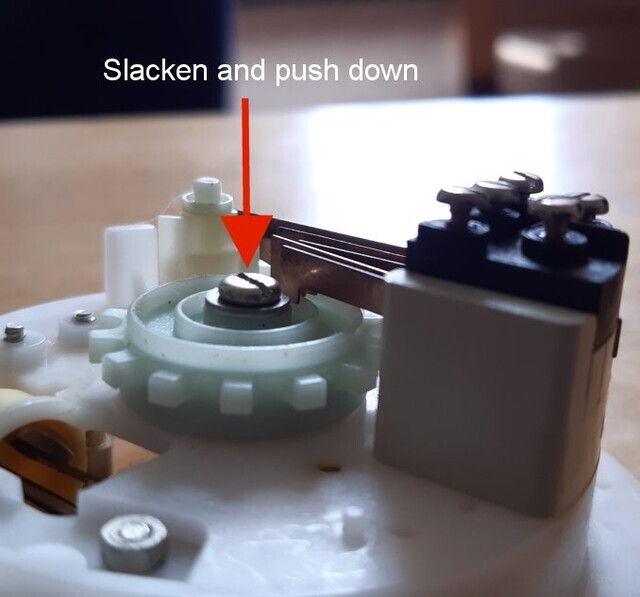
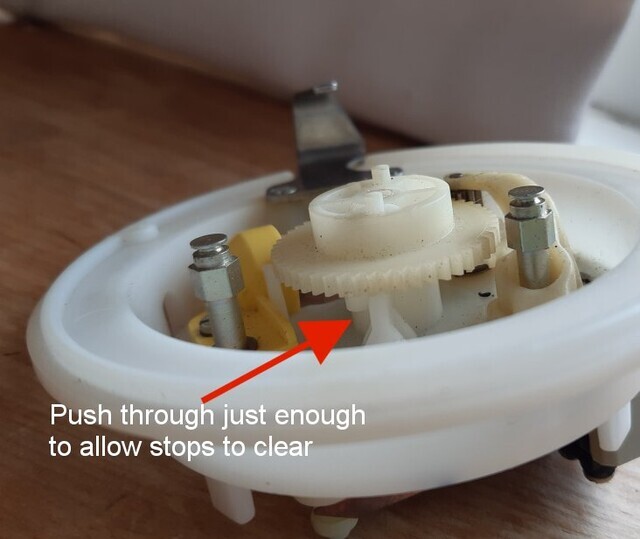
Now slacken the centre screw just enough to allow the main gear wheel, which is on the end of the spindle, to be pushed out of the body enough to allow the spindle stop lug to miss it's counterpart on the backplate.
Wind up the spring (experience is that two complete turns should suffice), then push and hold the spindle back down so the two lugs under the gear wheel line up again.
Tighten the screw. Warning - Don't undo the
screw too much or the keyway that locks the spring carrier with spindle
disengages and the spring goes ping! If this occurs then it has to
come apart again and reassembled.
This also applies to the
screw on the end of the governor. These have been made of plastic for
a long time and the head tends to shear. This causes an erratic dial.
|
|||||||
Last revised: July 23, 2025FM |